
Click here to view our video tutorial
Click here to download our PDF tutorial
A grocery run rarely goes as planned when the list lives on the back of an envelope or scattered across text messages to yourself. Items get missed, prices are hard to keep straight, and there’s no easy way to see what you actually spent once you’re home. Excel 365 offers a simple fix for this, without requiring you to build a spreadsheet from scratch.
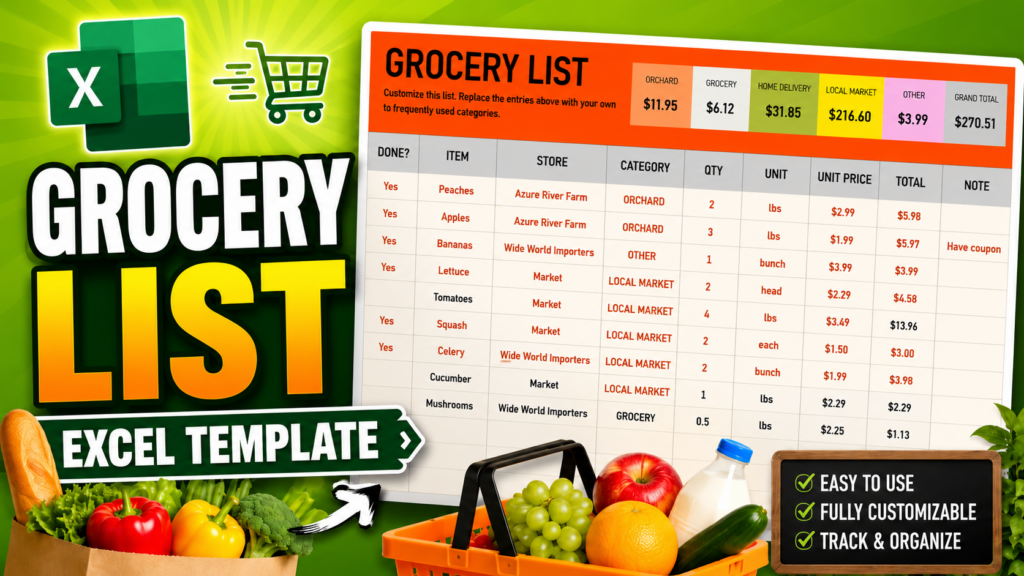
The Grocery List template is a ready-made workbook built right into Excel that gives you a structured place to plan out a shopping trip. It includes columns for the store, category, quantity, unit, and price of each item, along with a running total that breaks down what you’re spending by category, so you always know where your grocery budget is going.
In this guide, we’ll walk through exactly how to find the Grocery List template inside Excel, create your own copy, and then take a tour of the features that make it easy to use week after week, including how to check items off, reset the list, add your own items, and leave yourself notes.
Step 1: Open the File Menu
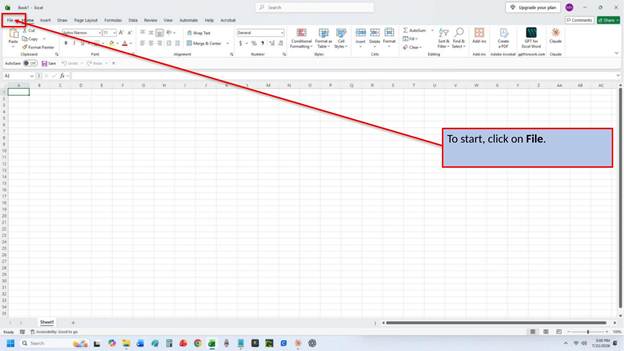
Like any new document in Excel, templates are accessed through the File menu. With Excel open, look to the top left corner of the ribbon and click on File to open Backstage view.
Step 2: Click New
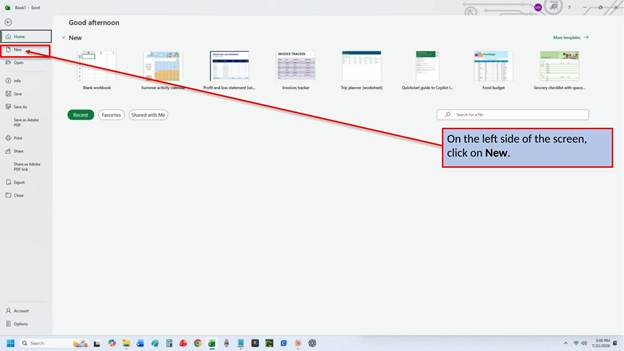
Once you’re in Backstage view, look to the left-hand side of the screen and click on New. This brings up Excel’s template gallery, a large collection of professionally designed workbooks you can use as a starting point instead of building a spreadsheet from a blank page.
Step 3: Search for a Grocery List Template
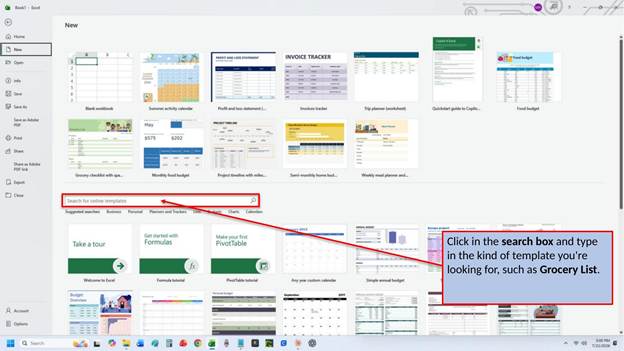
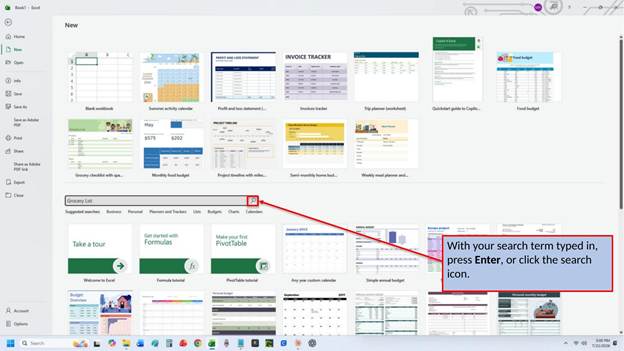
At the top of the template gallery, you’ll find a search box. Click inside it and type in the kind of template you’re looking for, in this case, Grocery List. This same search box works for all kinds of templates, so it’s worth remembering the next time you need a budget, an invoice, or a planner for something else entirely.
Step 4: Run Your Search
With your search term typed in, press Enter on your keyboard, or click the magnifying glass icon next to the search box, to pull up the matching results.
Step 5: Select the Grocery List Template
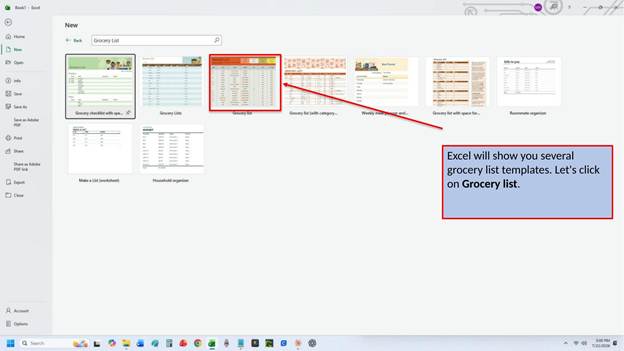
Excel will return several grocery list templates to choose from, each with its own layout and level of detail. For this walkthrough, we’ll select the one simply named Grocery list, which keeps things straightforward with columns for the item, store, category, quantity, unit, price, and total.
Step 6: Review and Create
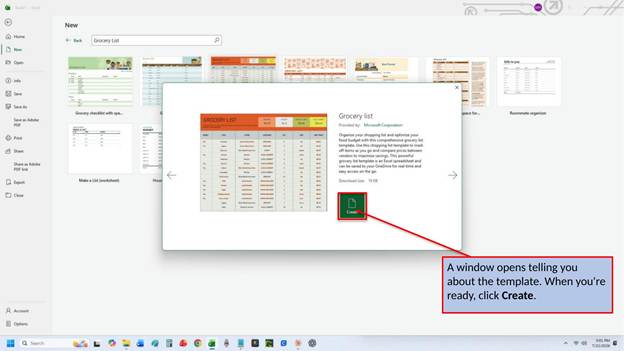
Selecting the thumbnail opens a preview window with a short description of what the template includes. Take a moment to read through it, and when you’re ready to get started, click Create.
Step 7: Your New Grocery List Opens
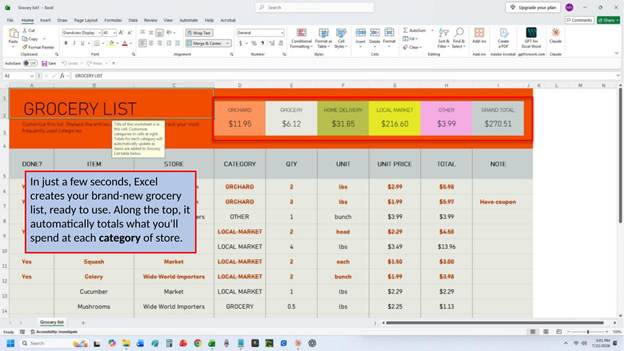
In just a few seconds, Excel builds a brand-new copy of the Grocery list template, fully formatted and ready to use. Along the top of the workbook, you’ll notice a row of colored boxes that automatically total what you’ll spend at each category of store, such as the grocery store, the local market, or a home delivery service. These totals update on their own as you fill in and check off items further down.
Getting to Know Your Grocery List
Once your list is open, it’s built around a handful of simple features that make it easy to actually use while you’re out shopping or planning ahead: a way to check off items as you go, a way to reset the list for your next trip, an easy way to add new items on the fly, and a spot for extra notes. Let’s walk through each of these.
Marking Items Done
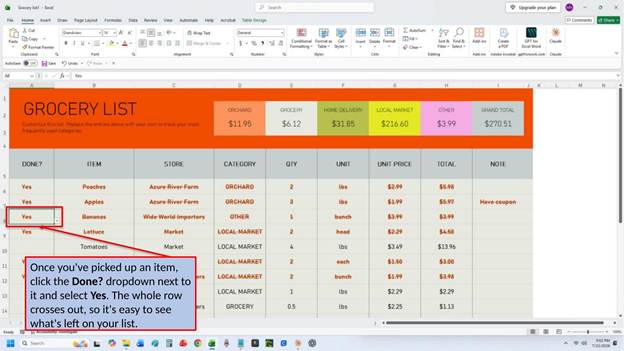
Every item on the list has a Done? dropdown next to it. Once you’ve picked it up in the store, click the dropdown and select Yes. The entire row, item, store, category, price, and all, crosses out with a strikethrough, so at a glance you can see exactly what’s left to grab versus what’s already in your cart.
Resetting the Done Column
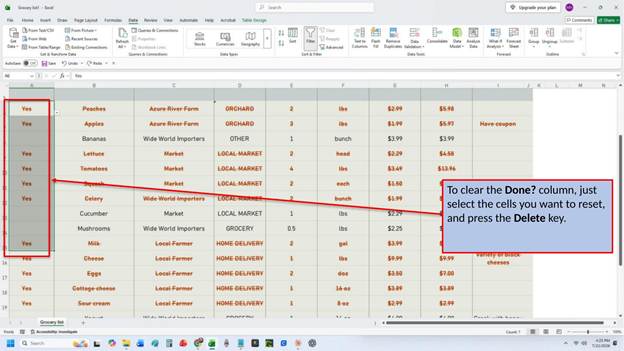
Since the Done? dropdown only offers Yes as an option, there’s no built-in button to flip a row back to not-done or to reset the whole list at once. Instead, the quickest way to clear it is to simply select the cell or cells you want to reset, whether that’s a single item or the entire column, and press the Delete key. This clears the checkmark without disturbing any of the other data in that row, so the same list can be reused for your next shopping trip.
Adding Your Own Items
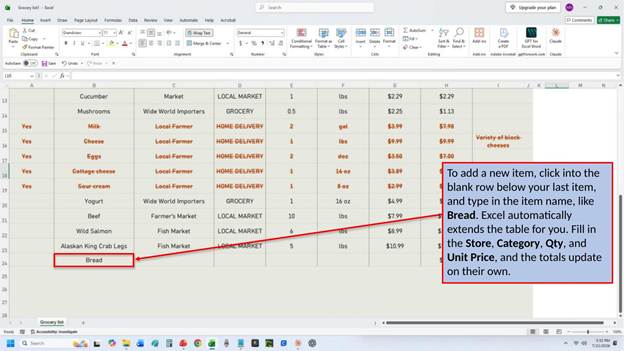
The item list isn’t limited to whatever comes pre-filled in the template. To add something new, click into the blank row directly below your last item and type in the item name. Because the data is set up as an Excel Table, it automatically extends to include the new row, carrying over the same formatting and formulas. From there, just fill in the Store, Category, Qty, and Unit Price, and Excel calculates the Total for that item along with the category totals at the top, all without any extra work on your part.
Adding Notes
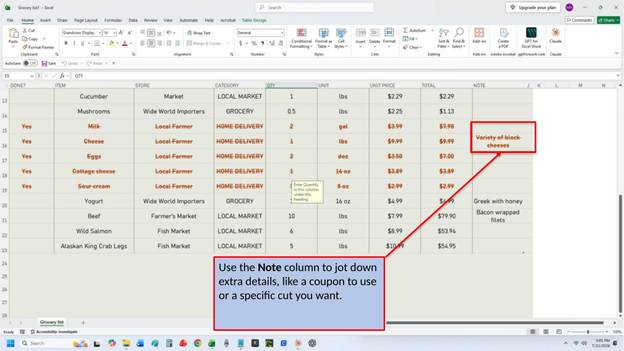
Each item also has a Note column, which is a handy spot to jot down anything that doesn’t fit neatly into the other fields, like a coupon you want to remember to use, or a specific cut or brand you’re after. Since it’s a normal text cell, you can be as brief or as detailed as you like.
With just a few clicks, you now have a ready-to-use Grocery List template that tracks your items, prices, and spending by category all in one place. Check items off as you shop, reset the list when you’re ready for your next trip, and add in whatever groceries you need along the way. The next time you’re planning a shopping trip, give Excel’s built-in Grocery List template a try and see how much easier it makes keeping track of both your list and your budget.
Video Tutorial
Download PDF Below