
Click here to view our video tutorial
Click here to download our PDF tutorial
If you’ve ever needed to merge a First Name and Last Name into one Full Name, you already know the usual routine: type a formula in the first cell, copy it down, and hope you didn’t miss a row or fat-finger a quotation mark. It works, but it’s one more thing to get right, and if you’re not comfortable writing formulas, it can turn a two-second task into a frustrating one.
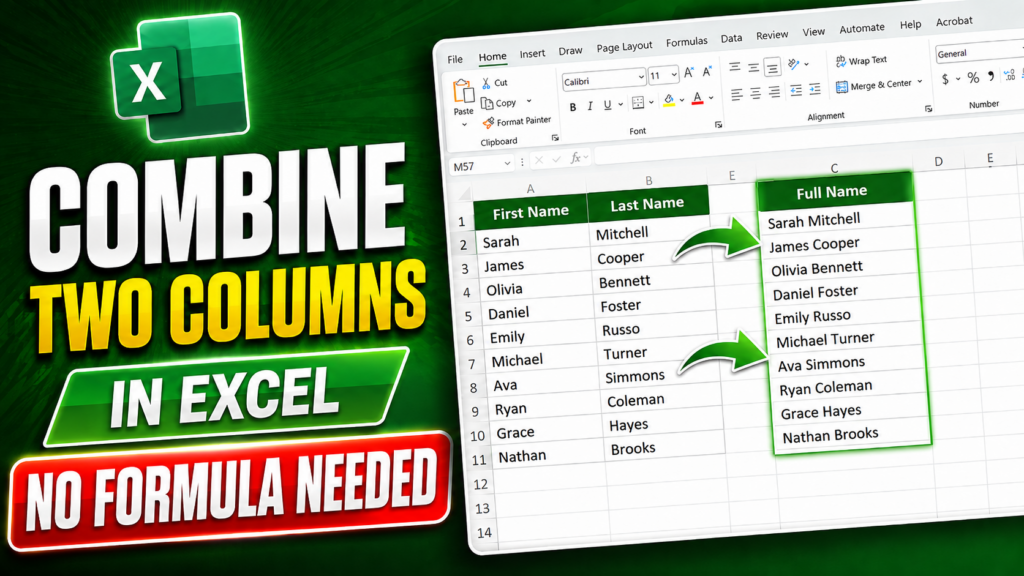
Excel 365 has a much simpler way to handle this called Flash Fill. Instead of writing a formula, you just type one example of what you want the result to look like, and Excel studies that example, recognizes the pattern, and fills in the rest of the list for you automatically. No ampersands, no quotation marks, and no formula syntax to remember.
In this guide, we’ll walk through exactly how to combine two columns in Excel using Flash Fill, starting with a simple First Name and Last Name list and ending with a fully combined Full Name column, built in just a few clicks.
Getting to Know Your Starting Data
Before we get into the steps, let’s look at what we’re working with. Here we have a First Name column and a Last Name column, with the Full Name column sitting empty right next to them. This is a common setup: names are collected or imported as separate first and last name fields, but for things like mailing lists, sign-in sheets, or reports, you often want them displayed as a single combined name instead. That’s exactly the gap Flash Fill is going to close for us.
Step 1: Type Your First Example
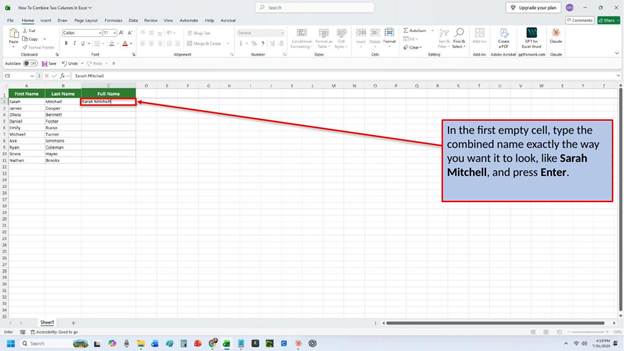
Click into the first empty cell in the Full Name column and type the combined name exactly the way you want it to appear, first name, then a space, then last name, for example Sarah Mitchell. This step matters more than it might seem: whatever pattern you type here is the pattern Flash Fill will copy for every other row, so take a second to make sure it’s formatted exactly the way you want your finished list to look. Once you’ve typed it, press Enter to move to the next row.
Step 2: Select the Remaining Cells
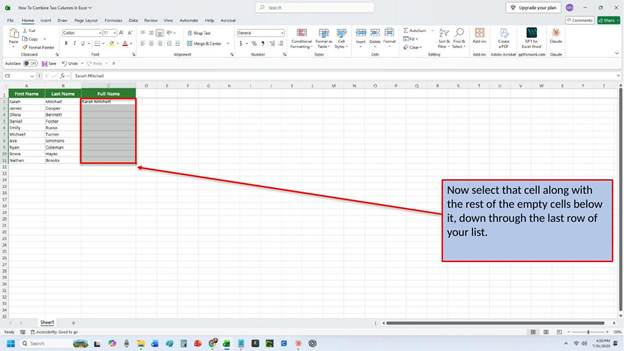
With your example in place, click back on that first cell and drag down to select it along with the rest of the empty cells below it, all the way through the last row of your list. Flash Fill works by looking at the example you gave it and then filling in whichever cells are selected, so this selection is what tells Excel exactly how far down your list to apply the pattern.
Step 3: Open the Data Tab and Click Flash Fill
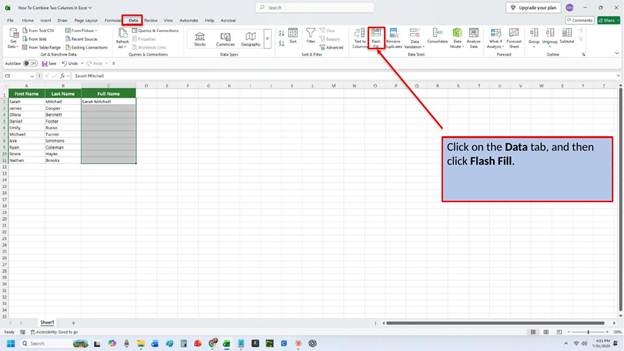
Next, click on the Data tab in the ribbon at the top of Excel. In the Data Tools group, you’ll find a button labeled Flash Fill. Click it, and Excel immediately gets to work analyzing the example you typed.
Step 4: Watch Flash Fill Do the Work
As soon as you click Flash Fill, Excel compares your example against the First Name and Last Name columns, recognizes that you’re combining the two with a space in between, and instantly fills in the rest of the Full Name column to match, no matter how many rows you have. It happens in a fraction of a second, and you don’t need to write, copy, or troubleshoot a single formula.

Step 5: Review Your Finished List
Take a look down the Full Name column and you’ll see every row now shows the combined name, formatted consistently from top to bottom. Because these are plain text values rather than formulas, you can sort, filter, or copy this column anywhere else in your workbook without worrying about broken references.

And that’s all it takes to combine two columns in Excel without touching a single formula. Flash Fill isn’t limited to names, either; it works just as well for combining addresses, joining phone number segments, or reformatting any other data where you can show Excel one clear example of the pattern you want. The next time you find yourself needing to merge two columns into one, skip the formula and let Flash Fill do the work for you.
Video Tutorial
Download PDF Below