
Click here to view our video tutorial.
Click here to download our PDF tutorial.
Enhancing your Excel 365 proficiency by mastering keyboard shortcuts for adding borders can significantly boost your efficiency, especially if you prefer or require a mouse-free workflow. Below is a detailed guide to applying various border styles using only keyboard shortcuts.
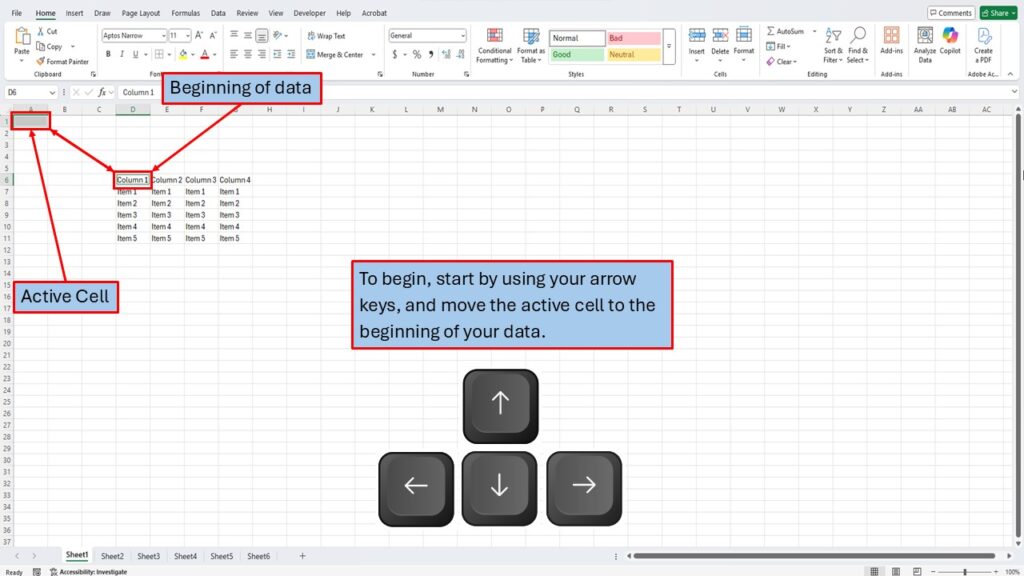
1. Selecting Your Data Range
- Begin by positioning the active cell at the start of your data using the arrow keys.
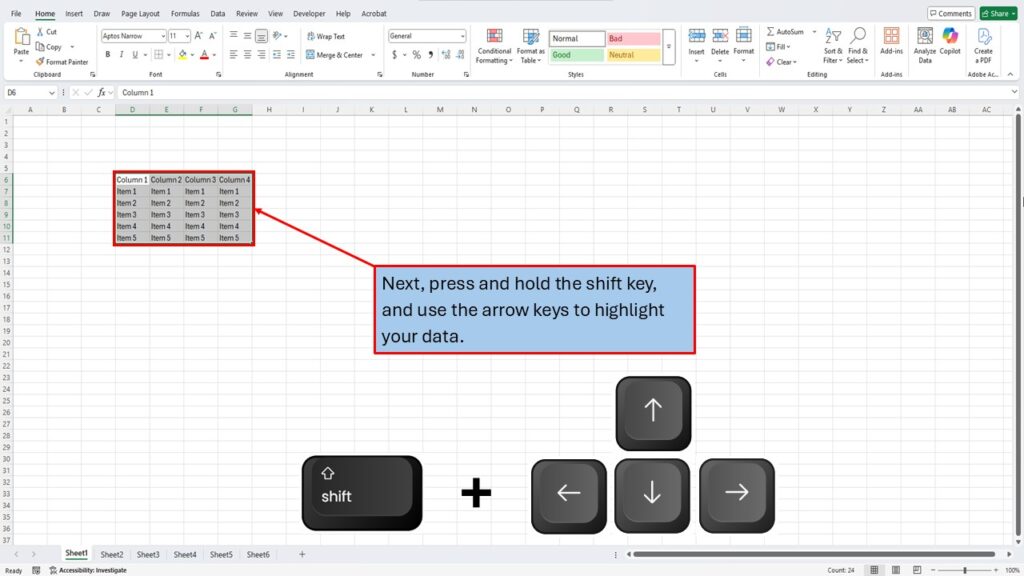
- Then, hold down the Shift key and use the arrow keys to highlight the desired range.
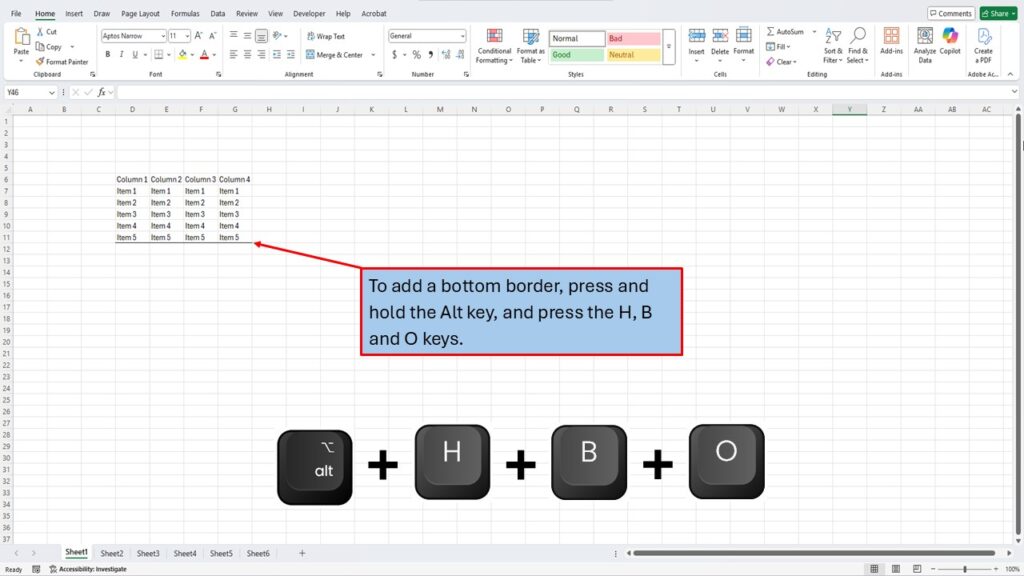
2. Applying a Bottom Border
To add a bottom border to the selected cells:
- Press and hold the Alt key, then sequentially press H, B, O.
This command navigates through the Ribbon interface to apply a bottom border.
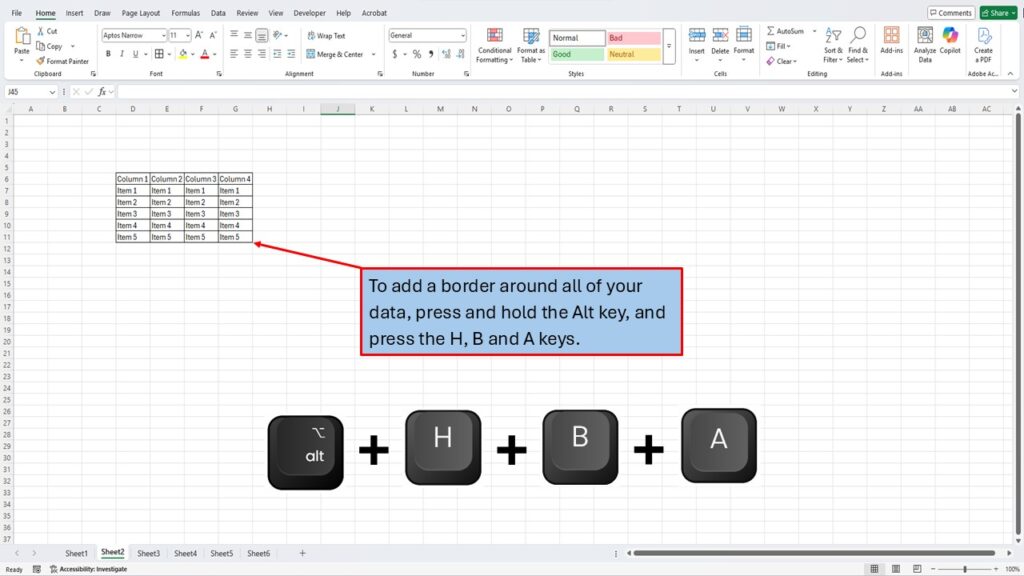
3. Adding Borders to All Sides
To enclose your selected data with borders on all sides:
- Press and hold the Alt key, then sequentially press H, B, A.
This shortcut applies borders around each cell in the selection.
4. Removing All Borders
To remove existing borders from the selected cells:
- Press and hold the Alt key, then sequentially press H, B, N.
This will clear all borders from the highlighted area.

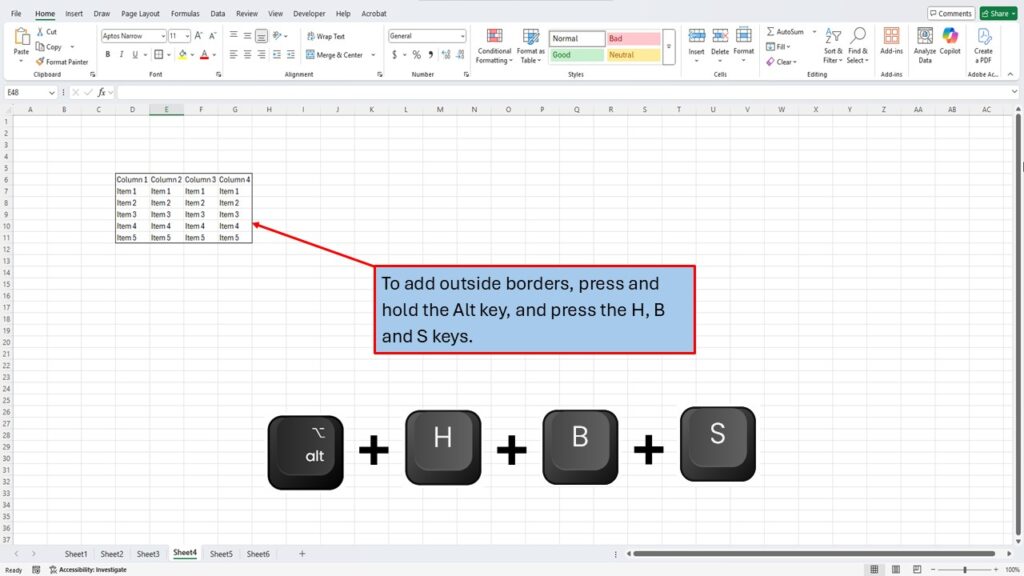
5. Applying Outside Borders
To add borders only to the outer edges of your selected range:
- Press and hold the Alt key, then sequentially press H, B, S.
This command places a border around the perimeter of the selection, leaving inner cell borders unaffected.
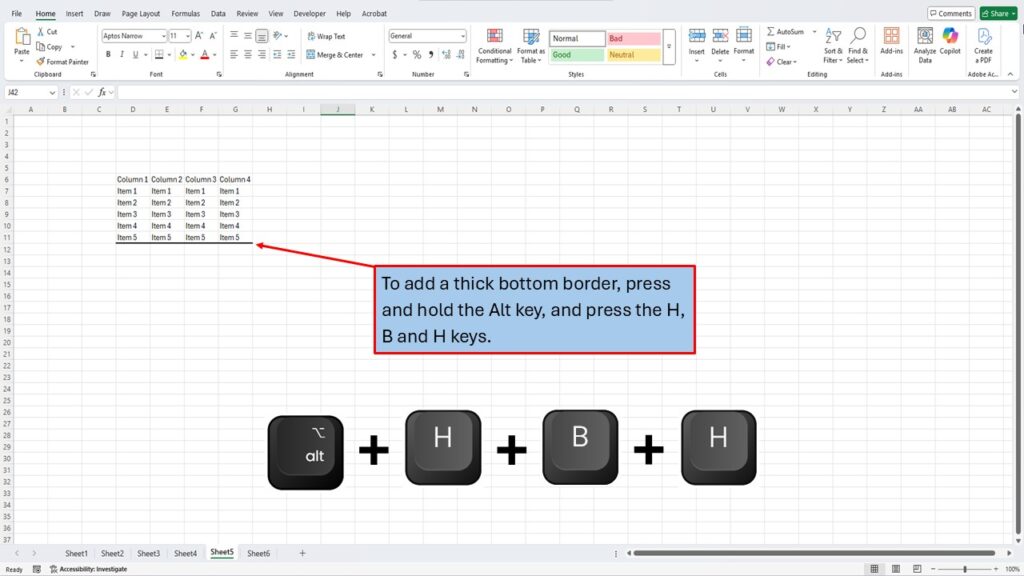
6. Adding a Thick Bottom Border
For emphasizing the bottom edge of your selection with a thick border:
- Press and hold the Alt key, then sequentially press H, B, H.
This applies a bold line to the bottom of the selected cells, useful for highlighting totals or section dividers.
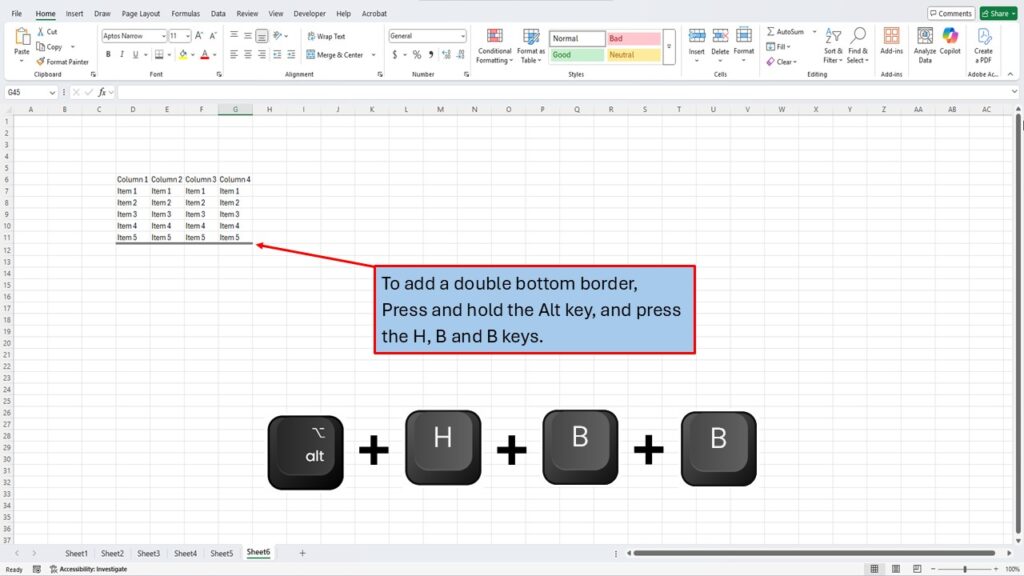
7. Inserting a Double Bottom Border
To insert a double line at the bottom of your selected cells:
- Press and hold the Alt key, then sequentially press H, B, B.
A double bottom border is often used to denote final totals or significant separations in data.
Additional Tips:
- Accessing More Border Options: For a comprehensive set of border styles and customization:
- Press Ctrl + 1 to open the Format Cells dialog.
- Navigate to the Border tab using the arrow keys.
- From here, you can select different line styles, colors, and presets to tailor borders to your preference.
By integrating these keyboard shortcuts into your Excel routine, you can enhance your productivity and maintain a seamless workflow without relying on mouse navigation.
Need More Help?
Video Tutorial
Download PDF Below