
Hello, and welcome to Mark’s Excel Tips. Today, I will show you how to easily create an editable Christmas Advent Calendar in Excel. I will also show you how to add your own photos, and how to stop that annoying pop-up notification you get with excel files that contain macros. Let’s get started.
Click here to view our video tutorial.
Click here to download our PDF tutorial.
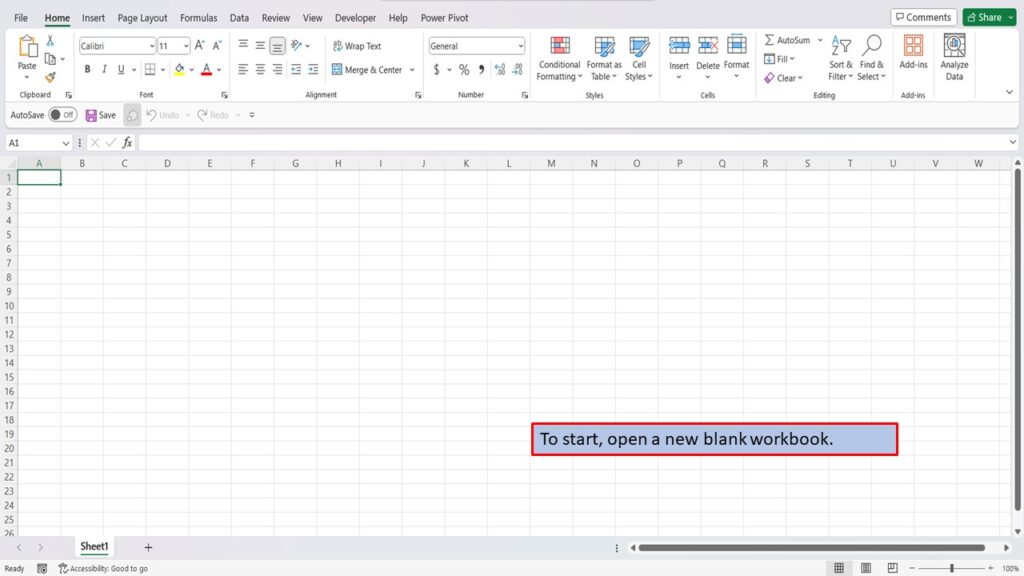
To start, open a new blank workbook.
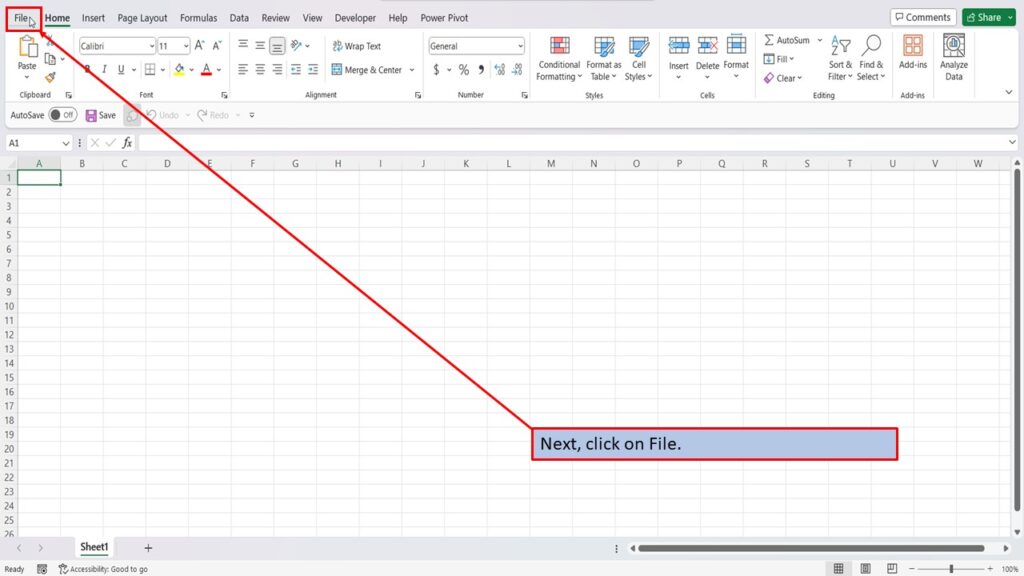
Next, click on File.
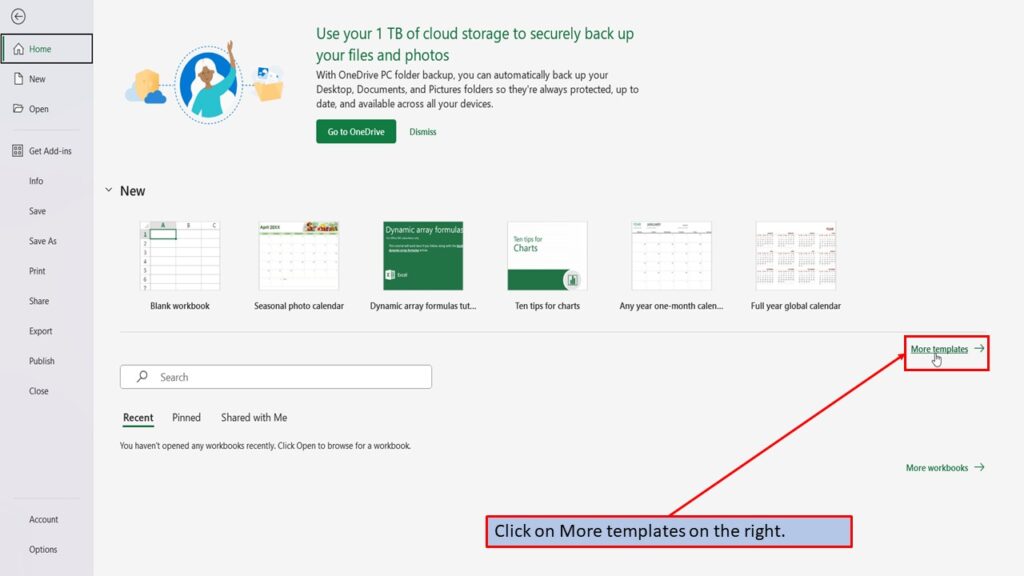
Click on More templates on the right.
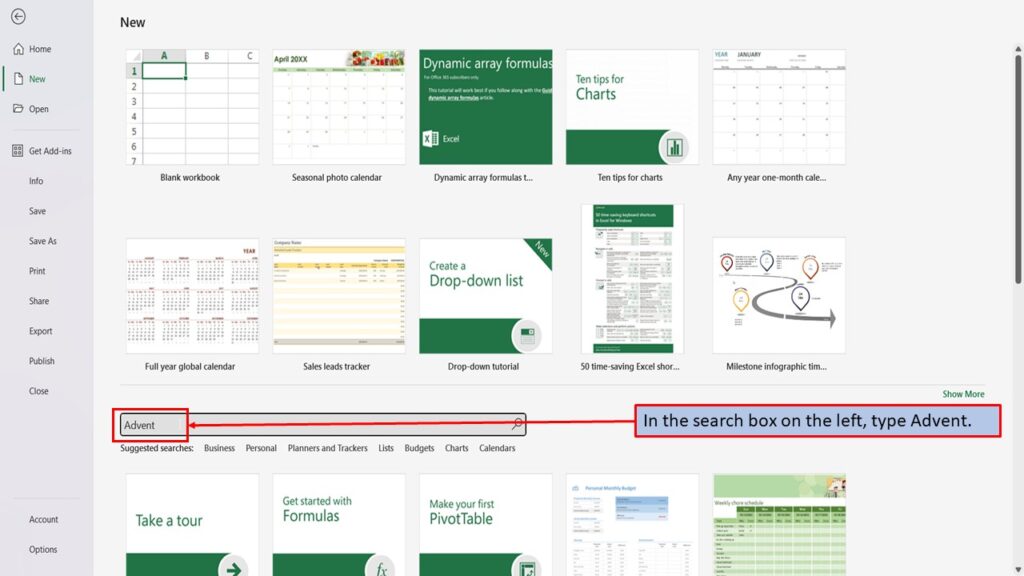
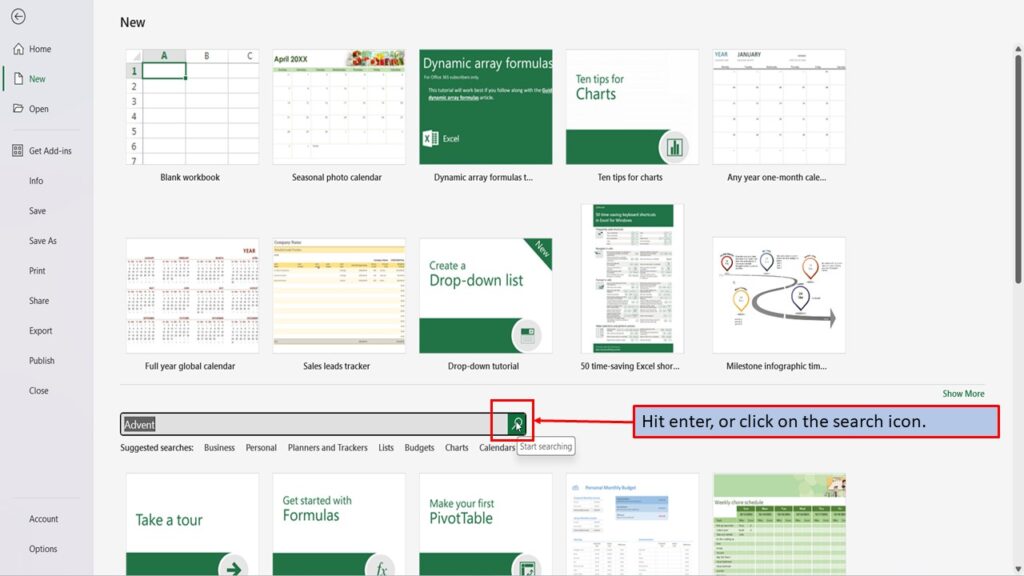
In the search box on the left, type Advent.
Hit enter, or click on the search icon.
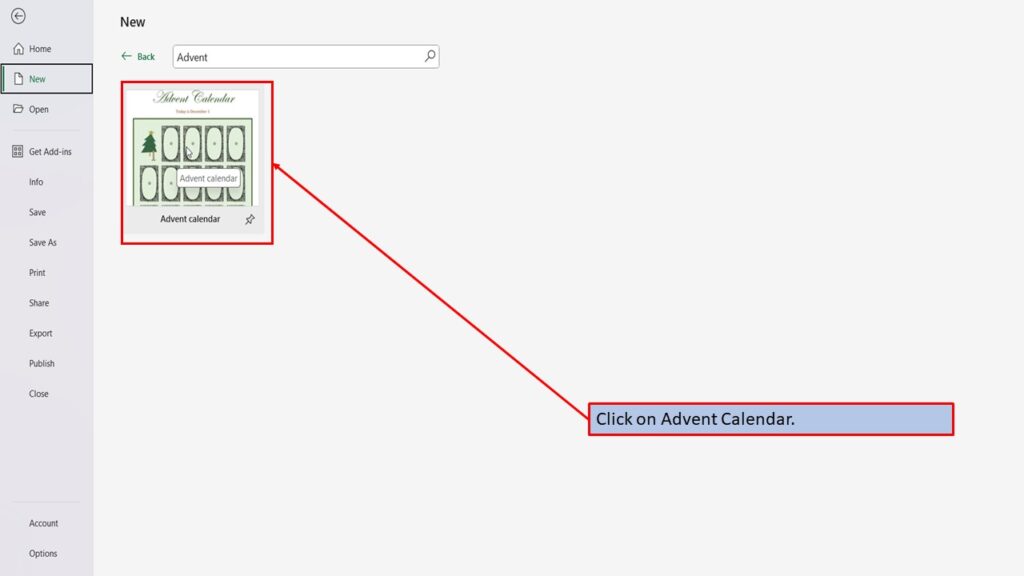
Click on Advent Calendar.
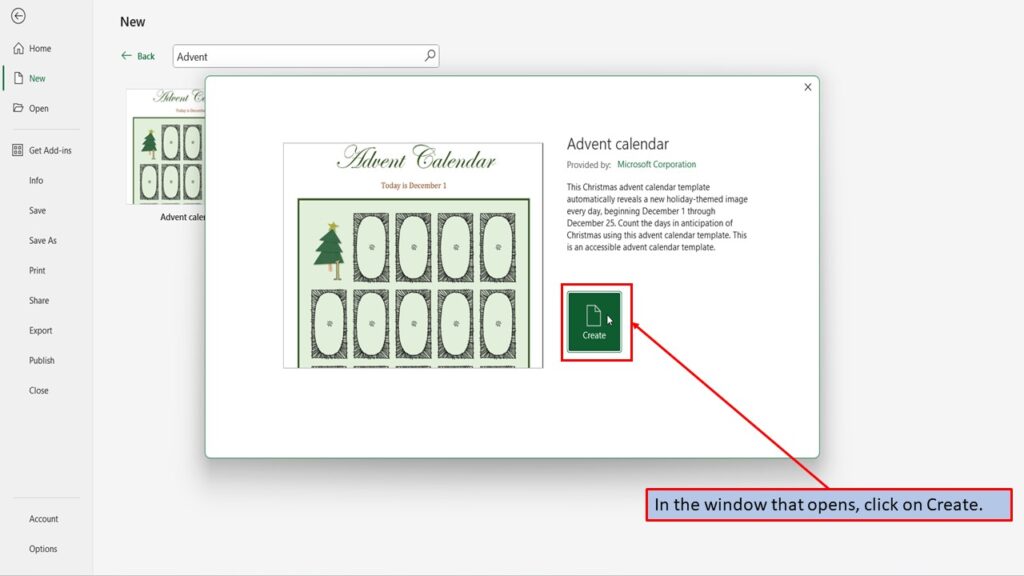
In the window that opens, click on Create.
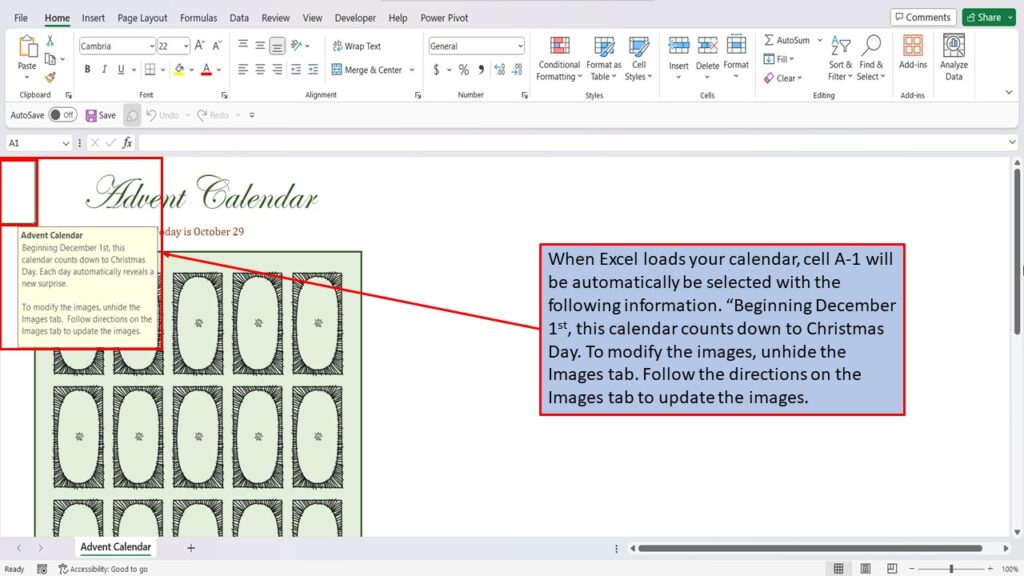
When Excel loads your calendar, cell A-1 will be automatically selected with the following information. “Beginning December 1st, this calendar counts down to Christmas Day. To modify the images, unhide the Images tab. Follow the directions on the Images tab to update the images.
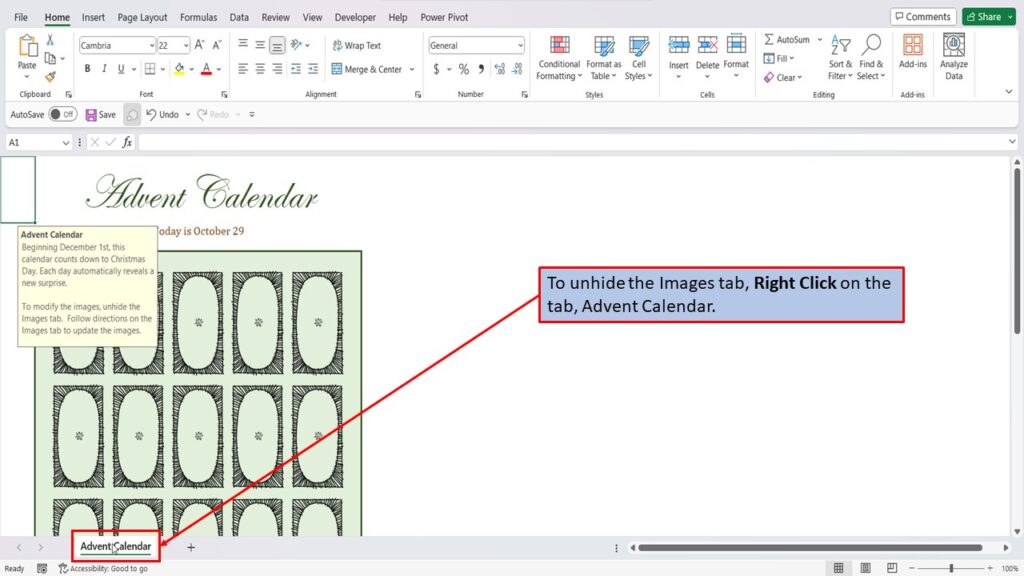
To unhide the Images tab, Right Click on the tab, Advent Calendar.
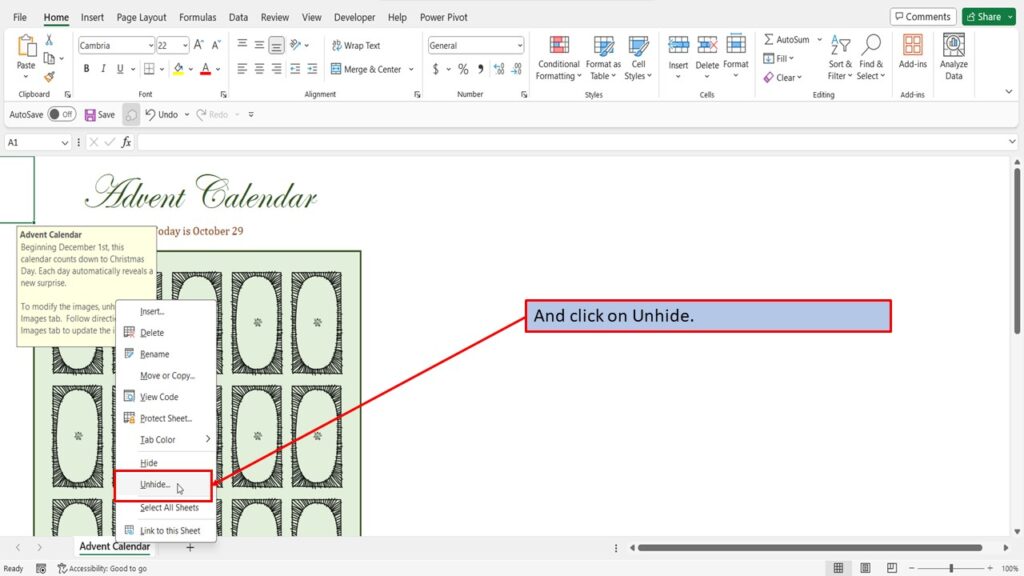
And click on Unhide.
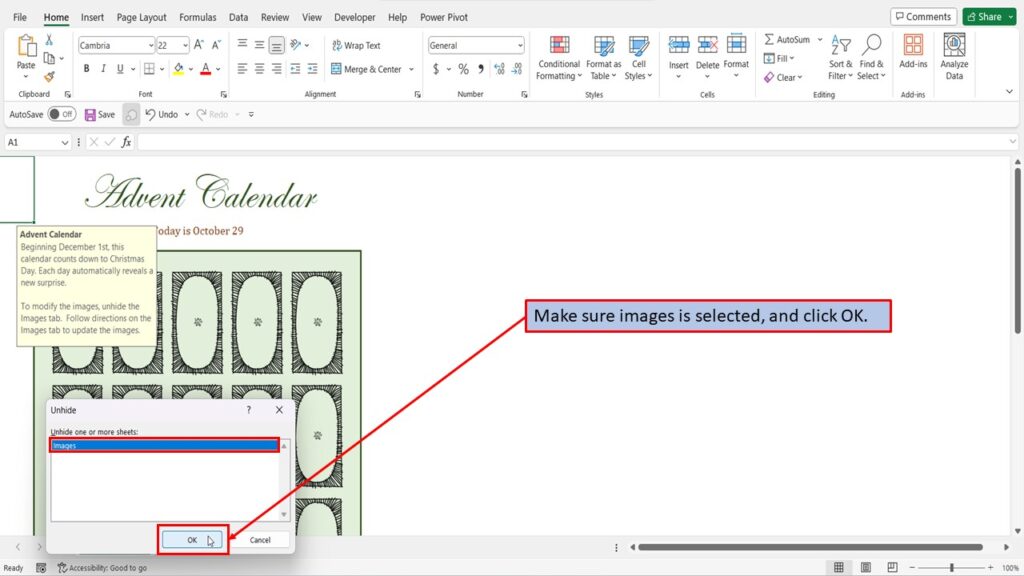
Make sure images is selected, and click OK.
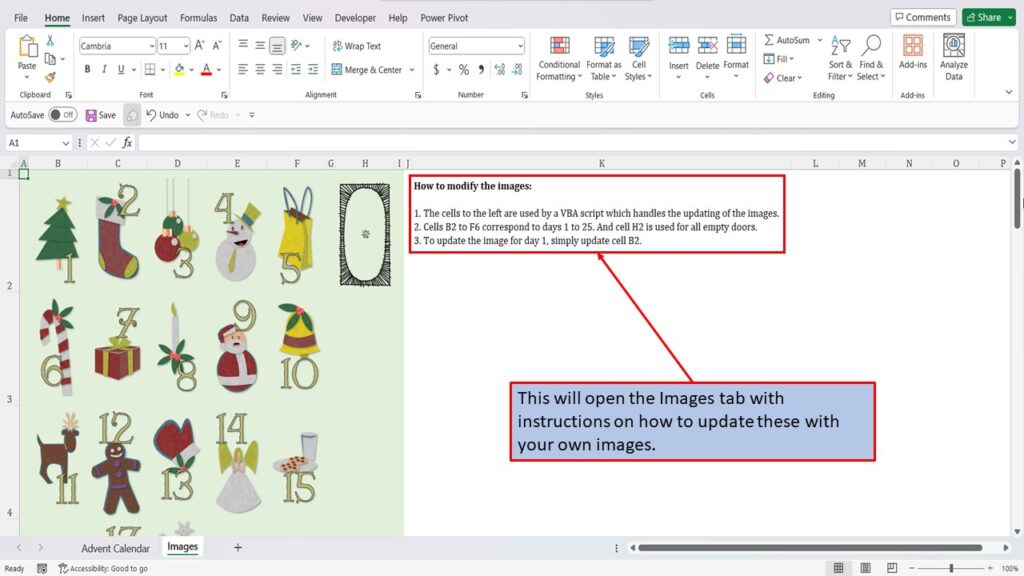
This will open the Images tab with instructions on how to update these with your own images.
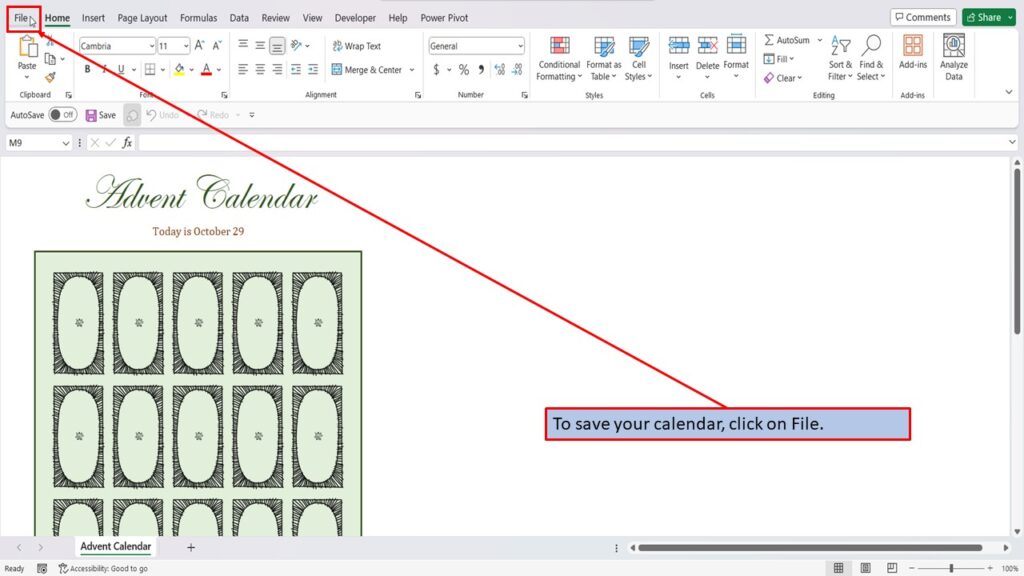
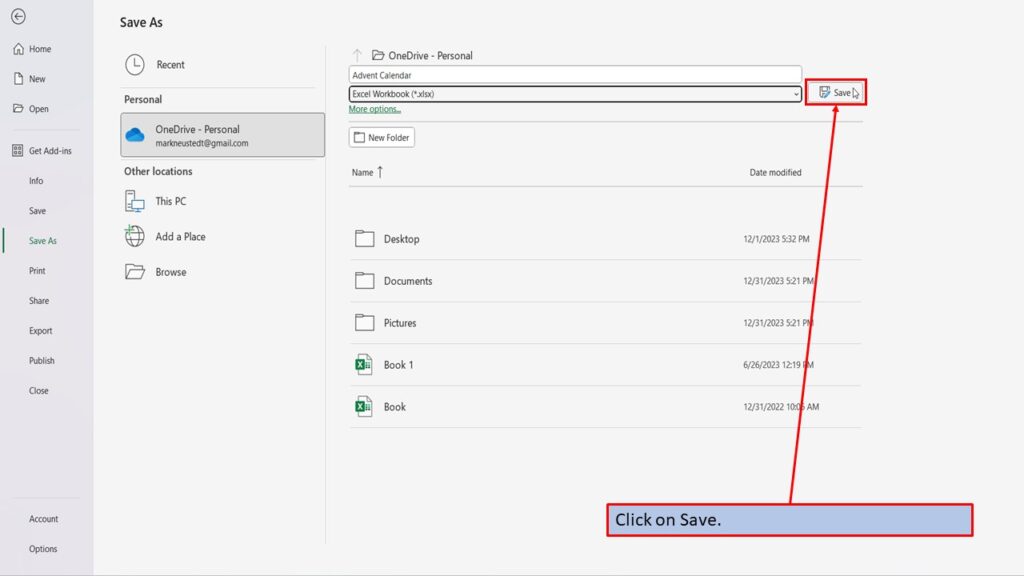
To save your calendar, click on File.
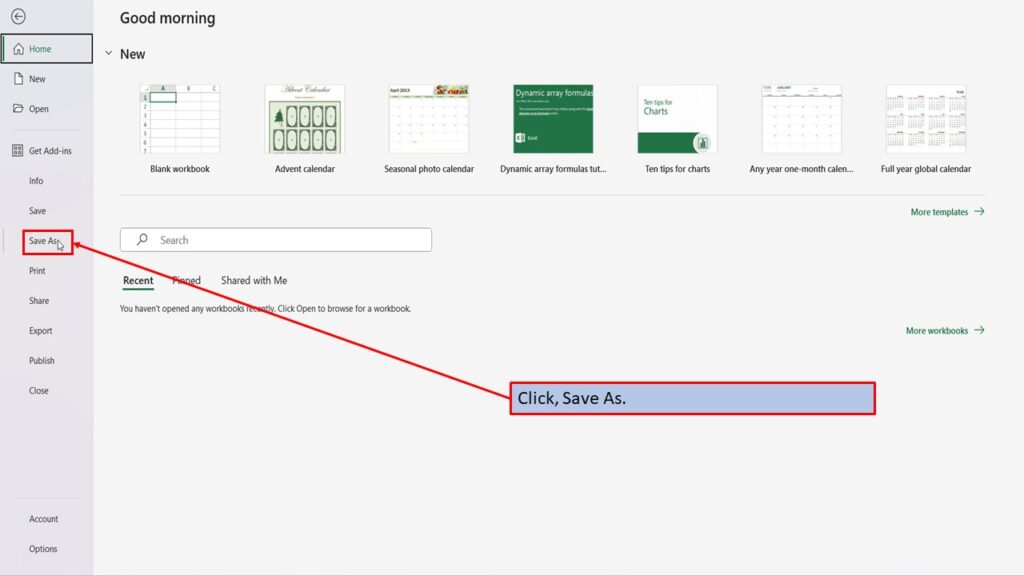
Click on Save As.
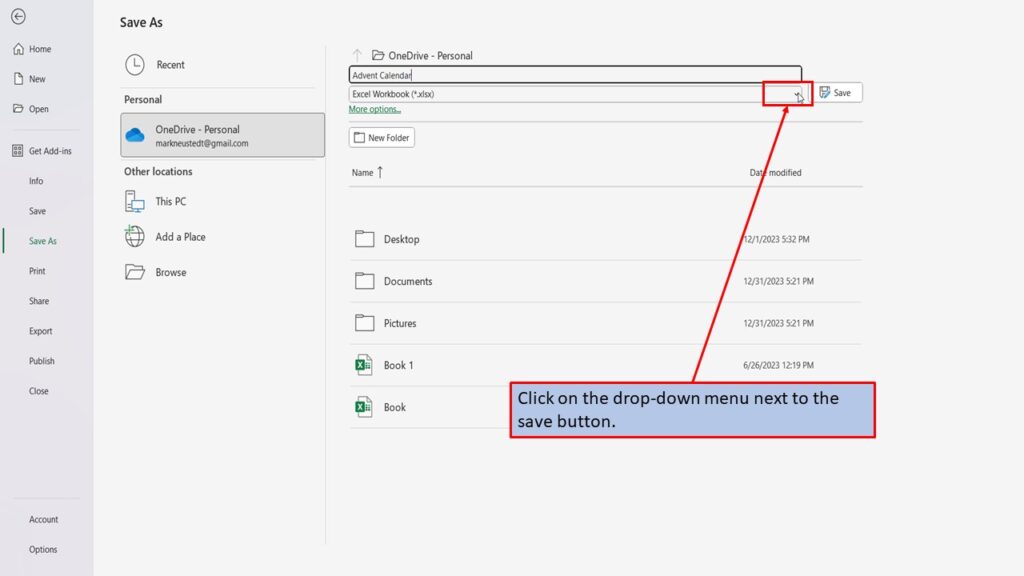
Give your calendar a name.

Click on the drop-down menu next to the save button.
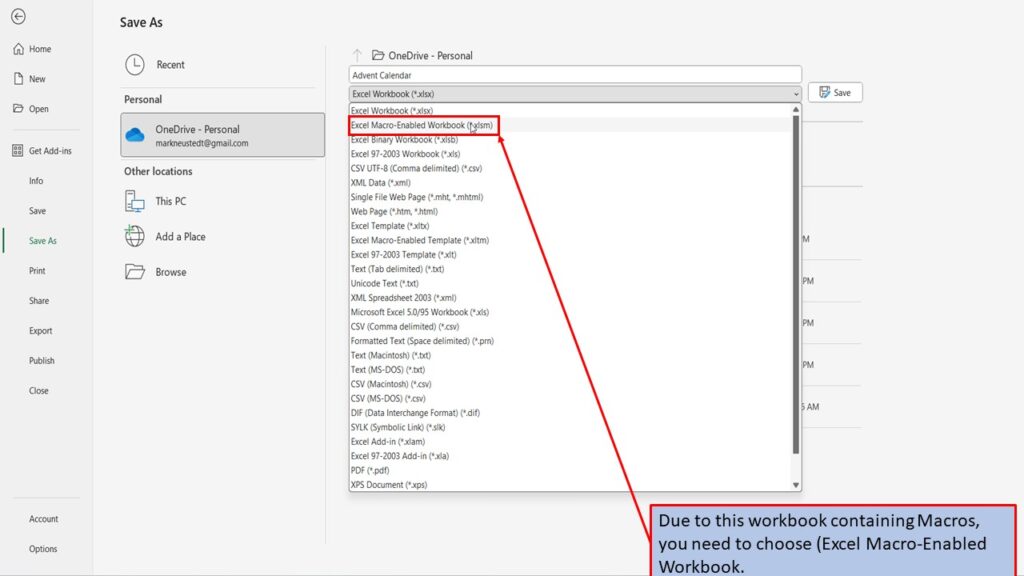
Due to this workbook containing Macros, you need to choose (Excel Macro-Enabled Workbook.
Click on Save.
Due to Excels security settings for Macros, you may get a message that says, (Be careful! Parts of your document may include personal information that can’t be removed by the document inspector.
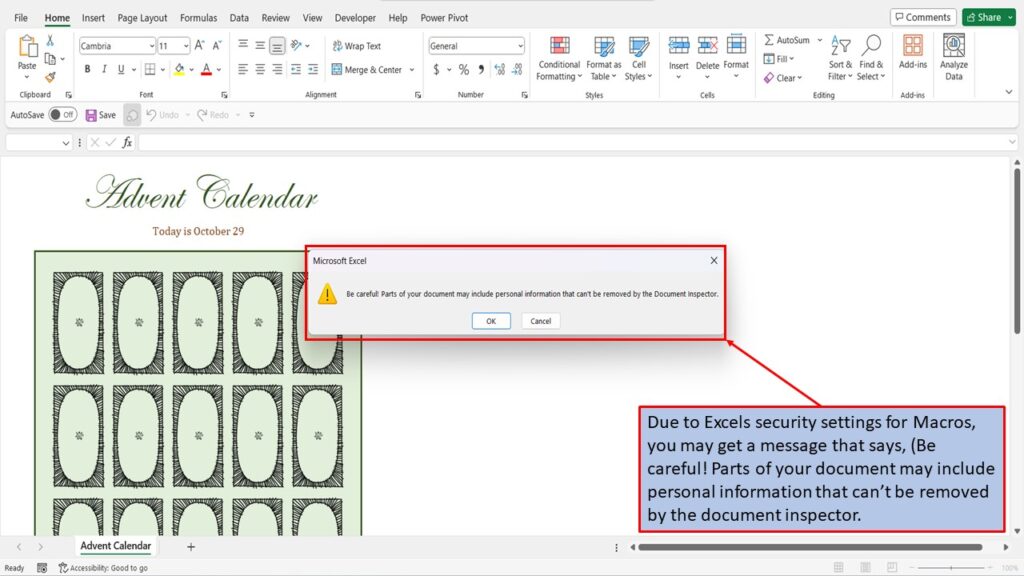
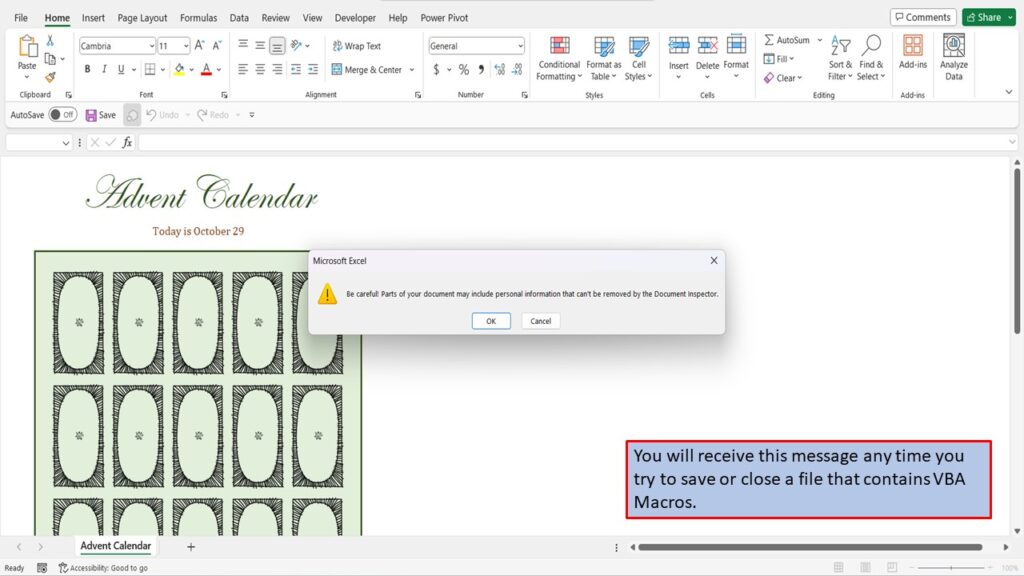
You will receive this message any time you try to save or close a file that contains VBA Macros.
To stop receiving this message, click on Cancel.
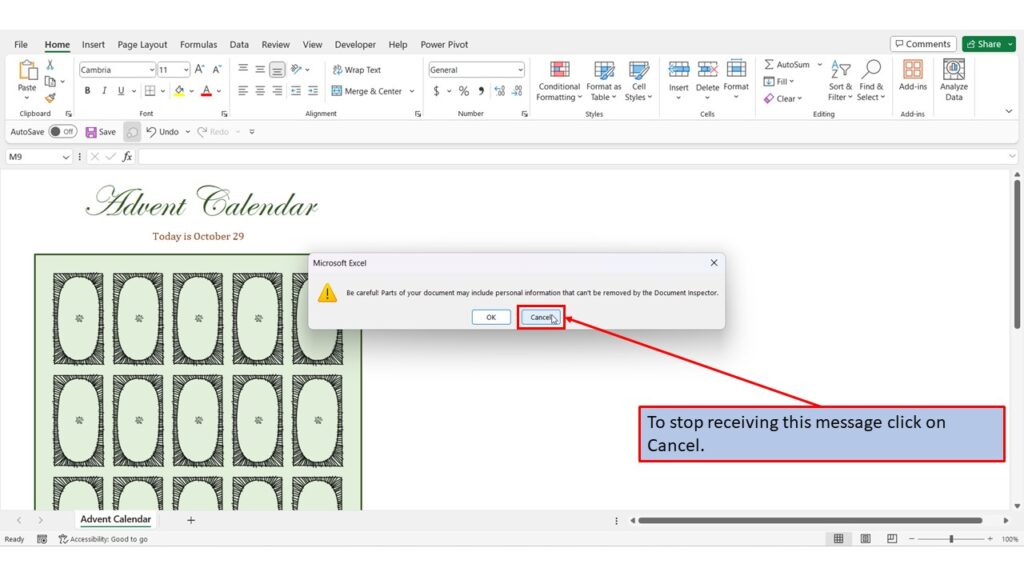
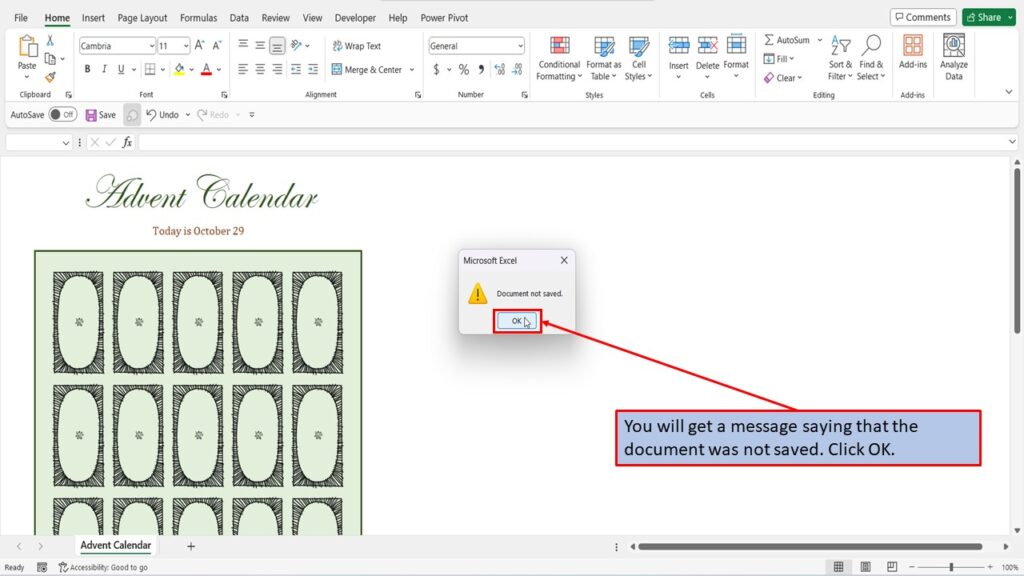
You will get a message saying that the document was not saved. Click OK.
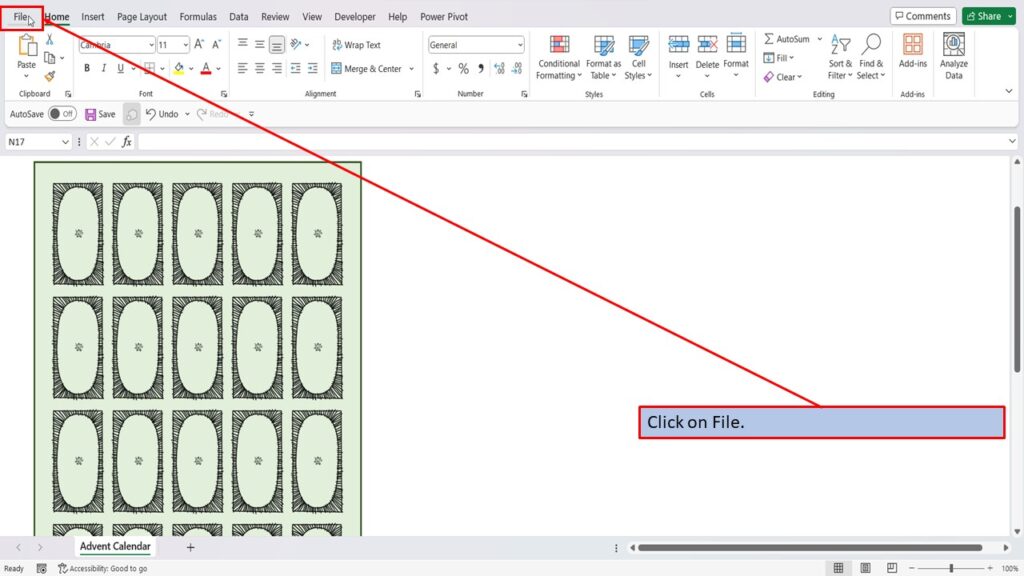
Click on File.
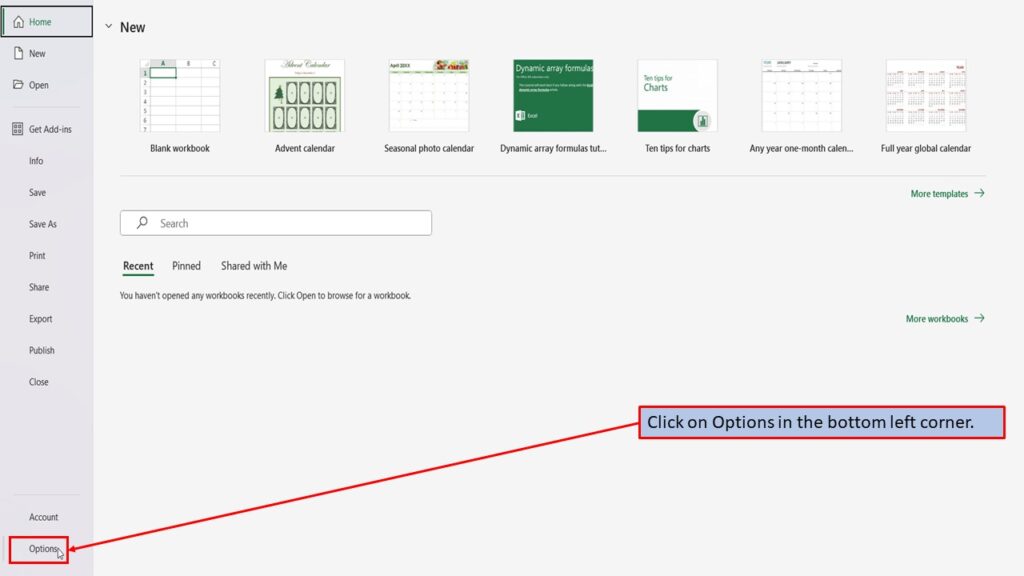
Click on Options in the bottom left corner.
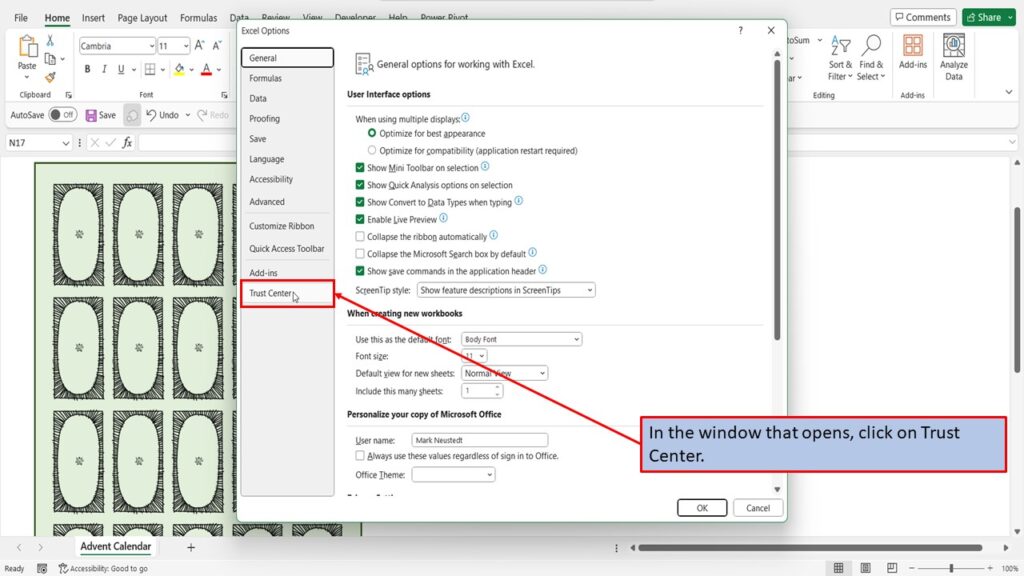
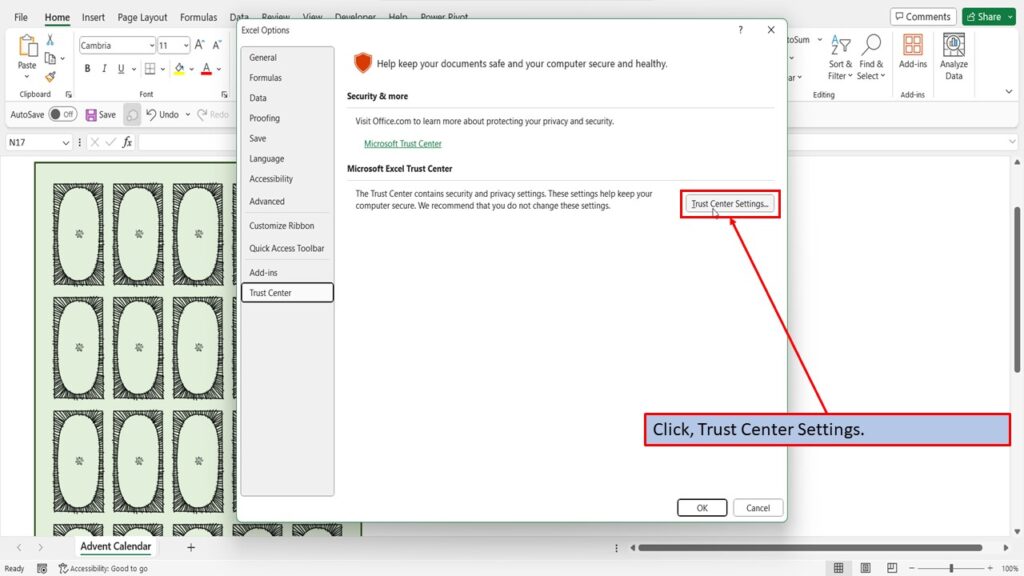
In the window that opens, click on Trust Center.
Click Trust Center Settings.
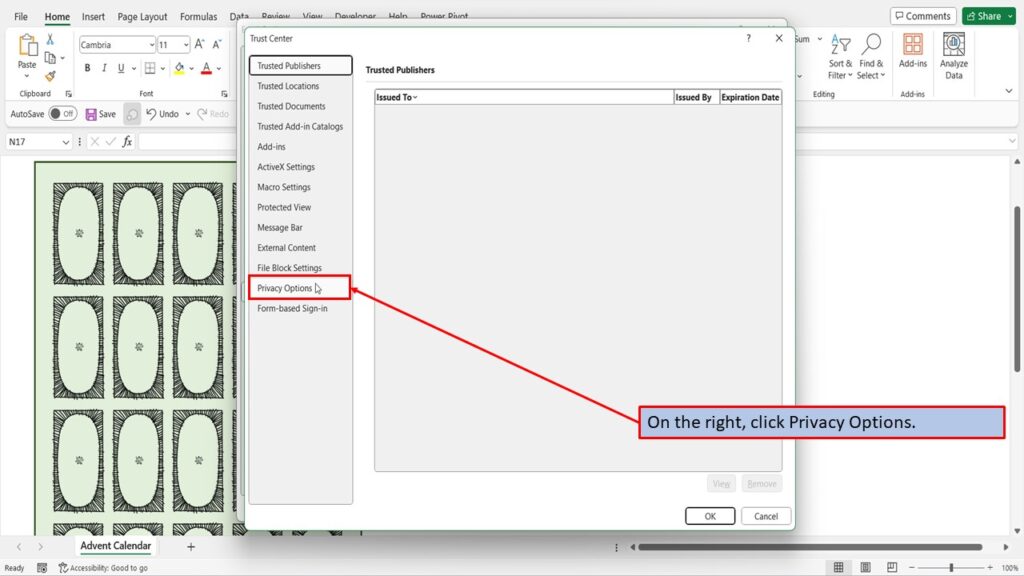
On the right, click Privacy Options.
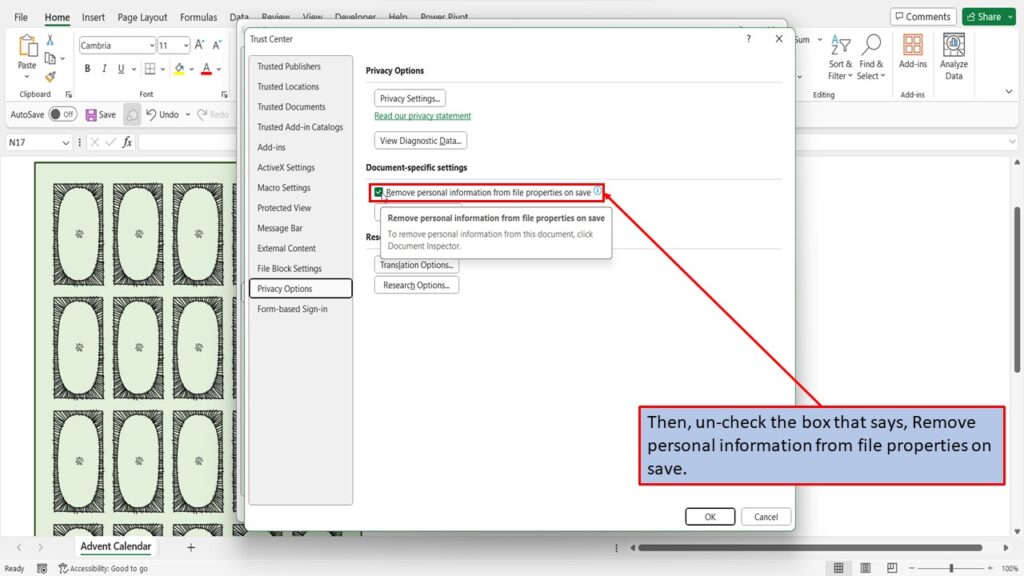
Then, un-check the box that says, Remove personal information from file properties on save.
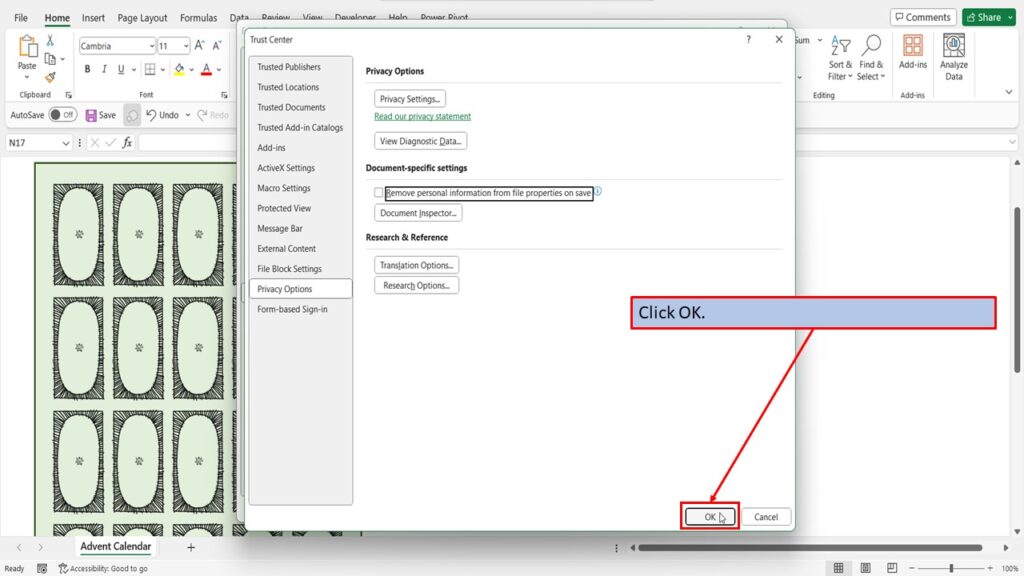
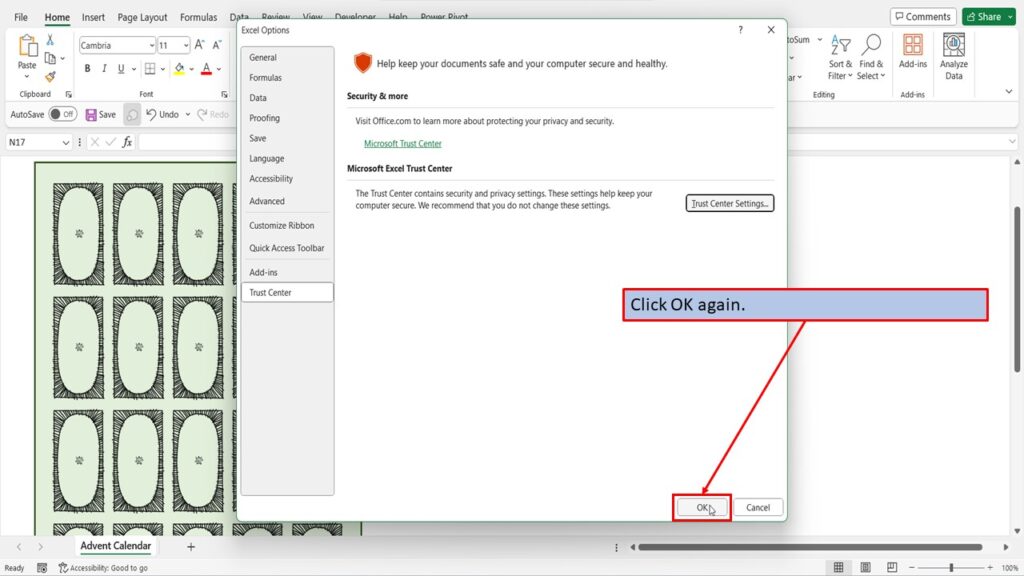
Click OK.
Click OK again.
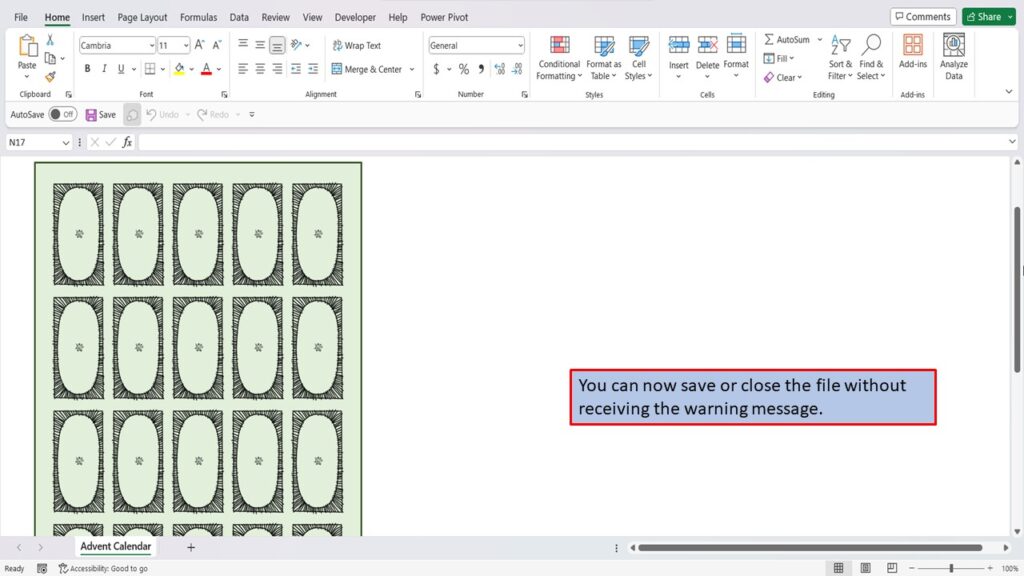
You can now save or close the file without receiving the warning message.
Need More Help?
View the Video Tutorial.
Download this tutorial in PDF by clicking the Download link below.